

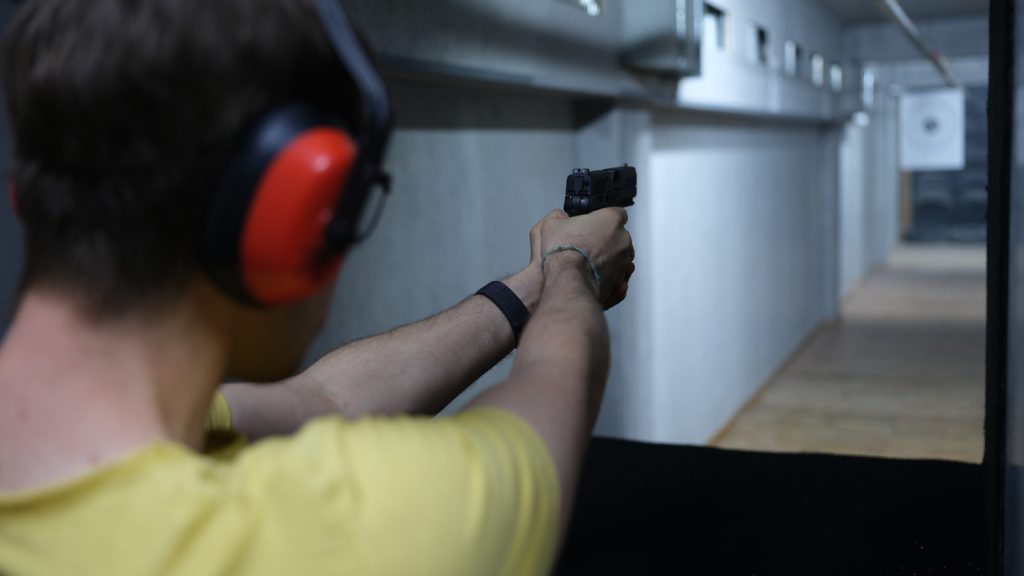
The truth most defensive shooters don’t want to face is that range time alone isn’t enough to build real skill. Range sessions are expensive, time-consuming, and limited by ammunition costs and travel. Even committed shooters who hit the range twice a month are looking at maybe 24 sessions per year — and skill in any physical discipline requires many more reps than that to build and maintain. The shooters who actually develop strong defensive capability are the ones who train at home between sessions. The way they train at home is dry fire.
Dry-fire practice is exactly what it sounds like — running the same mechanics you’d run on the range, but without live ammunition. Draw, presentation, sight alignment, trigger press, reset, follow-through. Every part of shooting except the actual round leaving the barrel can be practiced safely at home, and the shooters who do this consistently improve much faster than the shooters who only practice at the range. The mechanics of pulling a trigger, achieving a sight picture, and managing your draw don’t require recoil to develop. They require repetition. Dry fire is where the repetition happens.
This guide covers how to dry-fire safely, what drills produce real improvement, what equipment helps versus what’s marketing fluff, and how to integrate dry-fire practice into a routine that actually fits your life. The goal isn’t to replace range time. It’s to make your range time more productive by building the underlying mechanics at home, where reps are free.
The Safety Rules That Make Dry Fire Possible
Dry fire is safe — when done correctly. It’s also dangerous when done incorrectly, and the difference between safe and dangerous dry fire is following protocols that don’t bend, ever, no matter how routine the practice feels. Most negligent discharges during dry-fire practice happen because the shooter got casual after thousands of safe reps. The protocols below are not optional and not adjustable.
Rule 1 — Remove all live ammunition from the practice area. Do not just unload the firearm. Physically remove every round from the room you’re practicing in. Take live ammunition out of magazines, out of pockets, out of the area entirely. The reason is simple: the human brain in autopilot mode does not reliably track the difference between loaded and unloaded magazines after twenty repetitions. Removing ammunition from the room removes the possibility entirely.
Rule 2 — Confirm your firearm is unloaded. Then confirm again. Drop the magazine. Lock the slide back (or open the action). Visually inspect the chamber. Physically inspect the chamber with your finger. Cycle the action multiple times. Confirm the firearm is empty by looking and feeling. Then do it again before you start practicing. Then do it one more time after the second check. The redundancy is the point.
Rule 3 — Use a safe direction at all times. Identify a backstop in your home that would actually stop a round if something went wrong. An exterior wall facing nothing is not a backstop. A bookcase full of books is not a backstop. A safe direction means somewhere a round would be stopped before reaching anywhere it could cause harm — typically a basement wall, a designated practice area with proper backing, or a direction that allows for the worst-case scenario.
Rule 4 — No interruptions, no distractions. Phone goes on do-not-disturb. Family knows you’re in a dry-fire session and doesn’t enter the practice area. If you’re interrupted mid-session, treat the firearm as live until you’ve fully re-checked and re-confirmed it’s unloaded before continuing. The most dangerous moment in any dry-fire session is the moment you stop paying full attention.
Rule 5 — Separate practice from carry. Dry fire ends. Reload comes after. Don’t mix the two activities — finish the dry-fire session entirely, leave the practice area, then, in a separate physical location and mental space, prepare the carry firearm if needed. The cognitive separation prevents the worst possible mistake: completing dry-fire practice and then “just one more rep” with what’s now a loaded firearm.
What Dry Fire Actually Builds
Dry fire builds the mechanical skills that survive under stress. The trigger press without disturbing sight alignment. The smooth draw stroke from the holster to the extended position. The sight picture that comes back to the same place every time you present the firearm. These are the foundations of accurate, fast shooting, and they don’t require live ammunition to develop.
What dry fire doesn’t build is recoil management. You won’t develop your ability to handle muzzle rise, manage follow-up shots, or anticipate recoil through dry-fire practice. That part requires live fire. But the underlying mechanics — the ones that determine whether your first shot hits where you intended — do develop through dry fire, and they develop faster with consistent home practice than they do with range time alone.
The mental side of dry fire matters too. Practice that’s just going through motions without focus produces limited improvement. Deliberate practice — paying close attention to what your sights are doing, what your trigger finger is doing, what your grip is doing during each rep — produces real improvement. Five minutes of focused practice is worth more than thirty minutes of mindless reps. Treat dry fire as actual training, not as a time-filling activity.
A Basic Dry-Fire Routine
A productive dry-fire session for a defensive shooter looks roughly like this. Adjust to your equipment and your practice space.
Drill 1 — Trigger press from sight alignment. Present the firearm to a target on the wall. Achieve proper sight alignment. Press the trigger straight back without disturbing the sight picture. Watch what happens to the sights as the trigger breaks. If the sights move, your press has issues. Reset and repeat. Twenty to thirty reps. This drill alone fixes more accuracy problems than most shooters realize.
Drill 2 — Draw the first sight picture. From your normal carry position (or holster equivalent if you don’t carry), draw to a properly aligned sight picture on a target. Don’t press the trigger — focus on the draw mechanics and the sight presentation. The goal is consistency: the sights should appear in the same place every rep, with the same speed and the same grip. Twenty reps.
Drill 3 — Draw and press. Combine the previous two drills. Draw, achieve sight alignment, and press the trigger without disturbing the sight picture. Reset and repeat. The reset between reps is where you analyze what went well and what didn’t. Fifteen to twenty reps.
Drill 4 — Reload practice. Use empty magazines (confirmed empty, multiple times). Practice the magazine change motion — drop the empty magazine, draw the spare, seat the new magazine, return to firing position. Smooth, consistent motion is the goal. Speed comes from smoothness, not from rushing. Fifteen reps.
Drill 5 — Movement integration. From a static position, take a step laterally while presenting the firearm to the target. The combination of movement and presentation is awkward at first. Multiple repetitions with attention to footwork and grip stability produce improvement that translates directly to range performance.
The whole routine takes 10 to 15 minutes. Done three or four times a week, it produces improvement that’s visible at the next range session — and it costs nothing in ammunition.
Equipment That Actually Helps
The dry-fire industry has produced a large amount of equipment, most of which falls between “occasionally useful” and “marketing.” Here’s what’s actually worth considering.
A dry-fire safety device or training barrel. Some shooters prefer training barrels — replacement barrels designed specifically for dry-fire practice that can’t accept ammunition. They’re a useful additional safety layer, but aren’t strictly necessary if your safety protocols are solid.
A laser training cartridge. Laser cartridges insert into the chamber and emit a brief laser pulse when the firing pin strikes them, showing exactly where the firearm was pointed at the moment of trigger break. They’re useful for diagnostic work — seeing whether your sights moved during the press. The good ones cost $30-100 and last a long time. SIRT pistols (specifically designed dry-fire training pistols with built-in lasers) are more expensive but useful for serious practice.
A target system. Anything from a paper target on the wall to dedicated reactive targets that respond to laser hits works. Cheap is fine. The target’s job is to give you something specific to aim at — beyond that, fancy targets aren’t meaningfully better than basic ones.
A timer. A basic shot timer (or a phone app version) is useful for tracking your draw times, splits between presentations, and reload times. Knowing your actual times is what tells you whether you’re improving or practicing the same speed indefinitely.
A practice space. Dedicated space that you can use consistently is more important than the equipment in it. A corner of a basement, a converted spare room, or even a designated area in a garage works. Consistency of location matters because it lets you set up safety protocols you don’t have to recreate from scratch every session.
Common Mistakes in Dry-Fire Practice
The first common mistake is practicing without focus. Mindless repetition reinforces bad habits as effectively as good ones. If you’re not paying close attention to your sight picture, your grip, your trigger press, you’re not actually improving — you’re just going through motions. Five minutes of focused practice beats thirty minutes of distracted reps.
The second common mistake is practicing too long. Concentration degrades after 15 to 20 minutes of dry-fire practice. Reps after that point tend to introduce more bad habits than they fix. Better to do four 10-minute sessions per week than two 30-minute sessions. The shorter, more frequent format also fits real life better.
The third mistake is skipping the safety protocols once practice feels routine. After 50 sessions, the unloading and verification process feels like overkill. Do it anyway, every time, exactly the same way. The negligent discharges that happen during dry fire happen to experienced shooters who got comfortable, not to beginners who were paranoid about the rules.
The fourth mistake is treating dry fire as a replacement for live fire. It’s not. Dry fire builds mechanical skills. Live fire builds recoil management, follow-through under recoil, and the integration of all the mechanical skills under conditions that include actual gunfire. You need both. Skipping range time because you’ve been dry-firing at home produces shooters with strong fundamentals but limited live-fire capability. Skipping dry fire because you’re going to the range produces shooters with limited fundamentals and inefficient range sessions.
Integrating Dry Fire Into a Real Schedule
The reason dry fire works for skill building is that it’s accessible. Range sessions take an afternoon. Dry-fire sessions take 15 minutes. The shooters who improve fastest are the ones who treat 15-minute dry-fire sessions as part of their routine — three or four times a week, often in the same location at roughly the same time of day. The consistency matters more than the duration.
A practical schedule might look like: Tuesday and Thursday evenings, 15 minutes of focused dry fire after dinner. Saturday morning, a longer 30-minute session integrating multiple drills. Range time once or twice a month, where you verify that the dry-fire practice translates to live fire. Adjust to your life — but treat the schedule as a commitment, not a suggestion.
The other thing to track is what you’re working on. Skill development isn’t a single dimension — different drills target different skills, and rotating through them prevents the kind of plateau that happens when shooters do the same drill the same way for months. A simple notebook where you record what you practiced and what you noticed tells you where to focus the next session. Tracking your dry-fire sessions creates the same kind of structured improvement that journaling does for any skill-building activity.
How This Fits With Live Training
Dry fire is the foundation. Live training at Sword & Shield is where the foundation gets tested under conditions only live fire produces — recoil, time pressure, scenario-based decision-making, and the structured drills that push beyond what you can practice at home. The combination of regular dry fire and periodic live training produces faster skill development than either approach alone.
Students who come to pistol training, rifle training, or one-on-one shooting training with consistent dry-fire practice between sessions improve faster and retain more between sessions than students who only train when they’re at the range. The dry fire is what compounds the value of professional instruction. Without it, every range session starts from a slightly more rusted position than it would if home practice were happening between visits.
Frequently Asked Questions
Can dry fire damage my firearm?
Most modern firearms are designed to handle dry fire indefinitely. Some specific platforms — older rimfire firearms, certain models with cast firing pins — recommend snap caps or protection for repeated dry fire. Check your manual. For most defensive pistols and rifles, dry fire is safe.
Do I need snap caps?
Snap caps (dummy rounds with a cushioned primer area) are useful for some platforms and for malfunction drills. For straight trigger-press practice on most modern firearms, they’re not necessary. They’re cheap, so if you want them, get them — they don’t hurt anything.
How long should each session be?
10-20 minutes of focused practice, three or four times a week. Longer sessions tend to produce diminishing returns and introduce more habits than they correct.
Can I practice with my carry firearm?
Yes — but follow the safety protocols religiously, and separate the dry-fire session from carry preparation completely. Carry a firearm in the safe or holster after the session ends, and you’ve left the practice area, not as a continuation of the practice session.
What about laser-based dry-fire systems?
They’re useful diagnostic tools. The fundamentals of dry fire don’t require them, but they make it easier to see what your shots would have looked like and adjust your technique accordingly. Worth the investment if you’re committed to consistent practice.
Should I dry-fire before or after the range?
Both work. Practicing fundamentals before a range session warms you up and reinforces the right mechanics before live fire. Practicing after a session lets you work through anything you noticed at the range while the memory is fresh. Most consistent shooters do some of both.
Build the Skills That Show Up When You Need Them
Dry fire is the part of defensive training nobody can do for you. Sword & Shield’s instruction builds the live-fire skills, the scenario-based capability, and the decision-making that defines real defensive readiness. The mechanics that underpin all of it get built at home, in 15-minute sessions, repeated consistently over months and years. The shooters who treat dry fire as part of their routine become the shooters whose skills hold up when they matter.
📞 Call (678) 936-4403 | Schedule a Training